HammBurg Be informed with latest news, reviews, entertainment, lifestyle tips, and much more.

Are you looking for a creative and calming hobby? Making candles can be a great way to relax and express your creativity. With the help of candle making kits, the process becomes even easier and more enjoyable.
Whether you are a beginner or an experienced candle maker, these kits provide all the necessary materials and instructions to create beautiful and fragrant cone candles.
In this step-by-step guide, we will walk you through the process of making candles using candle making kits.
Step 1: Gather the necessary materials
Before you start making candles, it is important to gather all the materials you will need. Most candle-making kits include the following:
- Wax: The main ingredient for making candles. There are various types of wax available, such as soy wax, beeswax, and paraffin wax.
- Wicks: These are the strings that go in the center of the candle and provide the fuel for the flame. They come in different sizes and materials.
- Containers: Depending on the type of candle you want to make, you will need containers to hold the wax. These can be glass jars, tin cans, or any other heat-resistant vessel.
- Fragrance oils or essential oils: If you want scented candles, you will need oils that provide the desired fragrance. Fragrance oils are synthetic, while essential oils are derived from plants.
- Dyes or colorants: If you want colored candles, you will need dyes or colorants. These can be in liquid or solid form, and come in a wide range of colors.
Step 2: Prepare your workspace
Before you start melting the wax, it is important to prepare your workspace. Cover your work area with newspaper or a plastic tablecloth to protect it from any spills. Make sure you have enough space to work comfortably and keep all the materials within reach.
Before you begin the process of melting the wax, it is crucial to properly prepare your workspace. This involves taking certain precautions to ensure a safe and organized environment. One of the first steps is to cover your work area with newspaper or a plastic tablecloth.
This protective layer will prevent any spills or drips from damaging the surface beneath. Additionally, it will make the cleanup process much easier once you have finished working with the wax.
Another important aspect of workspace preparation is ensuring that you have enough space to work comfortably. This means clearing any unnecessary clutter or objects from your work area, giving yourself ample room to move around and handle the materials.
Having enough space will not only make the process more efficient but also reduce the risk of accidents or mishaps.
Step 3: Melt the wax
Using a pouring pot or a double boiler, melt the candle wax according to the instructions included in the kit. It is important to melt the wax at the recommended temperature to ensure proper consistency and avoid any safety hazards.
Use a thermometer to monitor the temperature of the wax throughout the melting process. Once the wax has reached the desired temperature, carefully pour it into the chosen candle mold or container.
Make sure to leave a small space at the top to allow for the addition of fragrance or other additives, if desired. If you are using a wick, secure it in the center of the mold or container before pouring the wax.
You can use a wick sticker or a dab of melted wax to hold it in place. Allow the wax to cool and solidify completely before moving or trimming the wick.
Step 4: Add fragrance and color
Once the wax is completely melted, it is time to add fragrance and color to your candles. Most candle making kits include fragrance oils and dye chips or liquid candle dyes. Follow the instructions provided to determine the appropriate amount of fragrance and color to add to the wax.
Stir the mixture well to evenly distribute the fragrance and color. Once the wax has fully melted, you can begin enhancing your candles with fragrance and color. Typically, candle making kits will come with fragrance oils and either dye chips or liquid candle dyes.
To ensure the best results, carefully follow the instructions provided to determine the appropriate amount of fragrance and color to add to the melted wax. Begin by adding the recommended amount of fragrance oil to the wax.
This will vary depending on the specific kit you are using, so it is important to refer to the instructions. Stir the mixture thoroughly to evenly distribute the fragrance throughout the wax. This step is crucial to ensure that the scent is evenly dispersed and will be present in your finished candles.
Step 5: Prepare the molds or containers
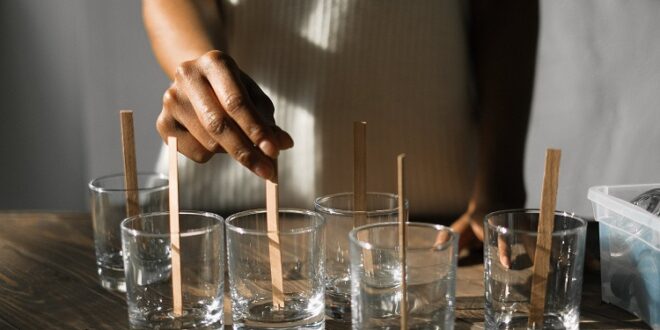
While the wax is still warm, prepare the molds or containers for pouring. If using molds, make sure to secure the wick in place by attaching it to the bottom of the mold using a wick sticker or hot glue.
If using containers, place the wick in the center and secure it with a wick holder or by tying it to a pencil placed across the opening. If using molds, make sure they are clean and dry before pouring the wax.
You can also spray them with a mold release spray to make it easier to remove the finished candle. If using containers, make sure they are also clean and dry. Place the wick in the center of the container, ensuring that it is straight and upright.
Step 6: Pour the wax
Now it’s time to pour the wax into the molds or containers. Slowly and carefully pour the wax into the prepared molds or containers, making sure to leave some space at the top.
It is recommended to pour the wax at a slightly lower temperature to prevent any shrinkage or cracking. To achieve this, you can use a thermometer to monitor the temperature of the wax. Once the wax has reached the desired temperature, begin pouring it into the molds or containers.
Start by pouring a small amount of wax into each mold, then continue to fill them up gradually. Take your time while pouring the wax to avoid any spills or accidents.
It’s essential to pour the wax slowly and carefully to ensure that it fills the molds evenly and doesn’t create air bubbles. As you pour the wax, be mindful of leaving some space at the top of each mold or container.
This space is necessary to allow for the wax to expand as it cools and solidifies. If you fill the molds or containers to the brim, the wax may overflow or cause the containers to crack.
Step 7: Let the candles cool and set
Allow the candles to cool and set undisturbed. The cooling process may take a few hours, depending on the size of the candles.
Avoid moving or touching the candles until they are completely solidified and cooled to room temperature. Once the candles have been extinguished, it is important to let them cool and set undisturbed.
This process can take a few hours, and the duration may vary depending on the size of the candles. It is crucial to avoid moving or touching the candles during this time, as it can disrupt the solidification and cooling process.
To ensure that the candles are completely solidified and cooled to room temperature, it is best to exercise patience and refrain from any interference.
Step 8: Trim the wicks and enjoy your candles
Once the candles are fully cooled and set, it is time to trim the wicks. Trim the wicks to about ¼ inch above the surface of the wax.
This will help the candles burn more evenly and prevent any excessive smoke or soot. Now, light up your homemade candles and enjoy the cozy and relaxing ambiance they create.
Once the candles are fully cooled and set, it is important to trim the wicks before lighting them. By trimming the wicks to about a quarter of an inch above the surface of the wax, you ensure a more even burn and prevent any excessive smoke or soot from forming.
To trim the wicks, you can use a pair of scissors or a wick trimmer specifically designed for this purpose. Carefully snip off any excess length, making sure to leave about a quarter-inch of wick remaining.
Conclusion
Making candles with candle-making kits is a fun and rewarding activity that allows you to unleash your creativity and create personalized candles for yourself or as gifts. By following this step-by-step guide, you can easily create beautiful and fragrant candles in no time. So, why not give it a try and enjoy the soothing and relaxing experience of candle making?