HammBurg Be informed with latest news, reviews, entertainment, lifestyle tips, and much more.

One of the questions we routinely encounter is “How do I prepare my artwork for a show?” From selecting works to placement on the gallery wall, there are so many aspects to consider. Showing your work is a key part of getting recognition and gaining collectors. Today we’ll be exploring what you need to do before the show and once your artworks arrive at the gallery. Keep reading to learn each step so you can have a stress-free exhibition.
Before the show
Before you even set foot on the gallery floor, there are some simple things you can do to get ready for your art show.
Step 1: Select your artworks
While this may seem obvious, selecting the artworks you will be exhibiting is an essential part of preparing for a show. Think about the gallery and any briefs they may have provided to ensure your work aligns with the show’s theme. If you’re exhibiting on your own in a solo show, choose your best pieces that highlight your artistic progression.
Step 2: Print
If you work in a digital medium, you will need to print your works with a professional printing service. Before you can send off your images, you’ll need to ensure they are in the correct format. Most printers recommend using images with at least 300 DPI for exhibition quality prints. Most printers prefer receiving lossless file formats, like TIFF, but check with your printer for exact specifications.
Giclée and C-type are the most popular printing styles available to artists today, with each type having its own advantages. Giclée is a halftone printing technique ideal for vivid prints in bright, true to life colours. In addition, Giclée printing has a +100 year longevity making it ideal for limited edition or archival prints. C-type is a printing technique initially used for colour photography but can now print any digital image. In addition, C-type can achieve beautiful tonal prints perfect for sunsets and can achieve huge print sizes up to 182cm x 300cm.
Step 3: Frame or Mount
You wouldn’t go out without shoes, so your artwork shouldn’t go out to the gallery without proper framing or mounting. Not only does framing and mounting help protect your artwork in transit and enable it to hang on the gallery wall, but a well-chosen frame or professional mounting can also set the mood, adding intrigue to your artwork. Take your work into a professional framing service to discuss which framing options will look best with your artworks. Bespoke framing and mounting may be an investment, but quality frames can elevate your artwork from run-of-the-mill to resplendent.
At the gallery
Once you have printed and prepared your artwork, it’s time to get them off to the gallery. Some galleries may provide an art handling service to transport your works from the studio to the gallery safely. Otherwise, you may need to organise your own transportation. Make sure all of your pieces are carefully wrapped and packed to protect your artworks in transit.
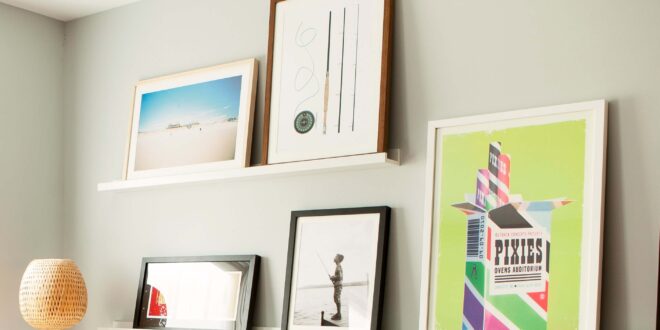
Step 4: Placement
Once your artworks arrive at the gallery, it is time to think about where you want to put them. Gallerists and curators may have some requirements, so speak with them before you start putting any holes in the wall. Placement is essential to drawing viewers’ attention to your works. We recommend hanging artworks for exhibitions approx—150 cm from the floor, at eye level.
Step 5: Fixings
Now that you know where you want your artwork, it’s time to get them on the wall. Different fixings will affect how your artwork hangs on the wall.
D-Rings & Cord
D-rings and cord are the most common fixing style and consists of two d-rings on the back of the frame connected by a cord or wire tied between. D-ring fixings can be used to hang up to A2 artworks with a nail or screw.
Straphangers
Similar to d-rings, straphanger fixings are for heavier frames, and consist of two straphangers on the back of the frame joined with wire or cord.
Split Battens
Split battens allow your artwork to sit flush to the wall by attaching two split battens to the back of the picture, while a third batten is attached to the wall making the artwork “float” against the wall.
Subframe
Subframes are used for heavier, more significant artworks. Using metal frames, they work in a similar way to split battens. Some large works may require an extra loose batten.
Step 6: Level
Once you have decided on your fixing and where you want your artwork, you’ll need to ensure they are level. Straight and level pictures scream professionalism. While a standard spirit level will work just fine, you may want to invest in a digital level. With optical lasers, digital levels can achieve pinpoint accuracy, so you can rest assured that each artwork is precisely level and where it should be.