HammBurg Be informed with latest news, reviews, entertainment, lifestyle tips, and much more.

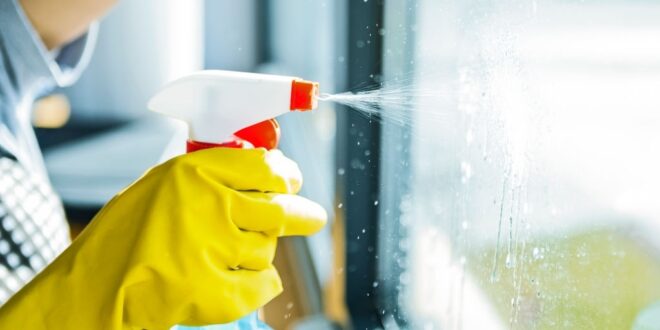
Window cleaning can sometimes seem like a hassle, especially if you have tall windows in your home. But you should clean your windows at least twice a year. Doing otherwise can end up costing you in the long run.
Dirty windows diminish the amount of heat and natural light that filters into your home. The effect is not only a darker home and increased energy bills, but the dirt on your windows can cause the glass to degrade over time.
You can eliminate this additional home maintenance task by hiring a professional window cleaner. They will charge around $258 to clean your home’s windows. That’s about $40 to $75 per hour. It’s the average cost to clean the windows on a house that’s about 1,500 square feet.
But if you don’t want to spend extra on this service, but you want to keep your windows in good condition for at least 20 to 25 years, you can do it yourself. Read on for tips on how to clean your windows.
Start With the Right Tools
Using the right tools can help make cleaning your windows a lot easier. There are a few you should invest in that are similar to what the professionals use. Here’s a list:
- Squeegee
- Microfiber cloth
- Window scrubber
- Bucket
- Hose with a sprayer attachment
- Long-handled brush or mop
- Glass/Window Cleaner
You can use a spray bottle to apply the window cleaner if you’re opting for a DIY solution. Newspapers can also be a surprisingly low-cost yet effective implement for a streak-free shine.
Homemade Glass Cleaning Solutions
Window Cleaning doesn’t have to be expensive. You don’t even have to buy a special cleaner to get the job done. Many household products can provide effective cleaning solutions, including:
- Vinegar and Dish Soap
- Dish Soap
- All-Purpose Cleaner
Vinegar and Dish Soap Window Cleaning Solution
You’ll need:
- 1/2 teaspoon dish soap
- 2 cups water
- 1/4 cup white vinegar
Combine all three ingredients and put the solution in a spray bottle. Spray the window, rinse with water, and then wipe.
Dish Soap Window Cleaning Solution
You’ll need a teaspoon of dish soap and two gallons of water. Mix in a bucket and apply to your windows with a cloth or sponge. When you’re finished, there won’t be any streaks.
All-Purpose Window Cleaning Solution
You’ll need:
- 2 teaspoons dish soap
- 1 gallon distilled water
- 1/4 cup ammonia or vinegar
- 2 cups (90%) rubbing alcohol
Add all the ingredients, except the dish soap to half a jug of the distilled water. Fill the rest of the jug with the water, then add the dish soap. Apply using a spray bottle, cloth, or sponge.
11 Top Window Cleaning Tips
Cleaning your windows may seem like a straightforward task. However, there are tips you can use for more effective results and a quicker cleaning process.
- Know The Best Time To Clean
You might believe that the time you choose to clean your windows is insignificant. Of course, you already know it’s pointless to do it when it’s raining.
But did you also know it isn’t wise to clean your windows on a hot day? Hot days, although nice, can cause your glass cleaner to dry after applying it to your window. The result is a film, streaks, patches, or residue that makes you have to do the work twice.
A cloudy or overcast day is better than either of the extremes mentioned above. It facilitates thorough application and removal. When it’s overcast, you also won’t have to endure the sun and heat while you’re cleaning.
- Start on the Inside
Clean the interior of your windows first. But there are a few steps you should take before applying any cleaning solution. It’s important to remove any dirt and dust before starting in-depth cleaning.
If you have blinds on your windows, dust these first. You don’t want to clean your windows, only to have the dust and dirt from your blinds get onto them when you pull them down. You should remove any dirt and dust on the window panes as well.
Applying your cleaning solution without doing this could result in a murky mess of dirt smeared across your window. This makes the cleaning process even harder. Use a cloth or paper towel to remove excess dirt before you apply your window cleaning solution.
- Ensure Your Solution Is Streak-Free
Once you’ve prepped your windows, if you’re using a homemade cleaner, make sure it’s streak-free. You don’t want to be faced with streaks once the sun is out and you’ve already done all the work.
Fortunately, some other homeowners have already done the work for you. All the solutions mentioned above provide streak-free results.
- Don’t Forget The Window Tracks
Your windows consist of more than just their glass panes. They won’t be truly clean unless you get to all the various parts. Your window tracks are particularly important because the dirt that accumulates in them can be hard to reach.
You can conquer this challenging element of window cleaning with a sponge brush. Dip the brush into an all-purpose cleaner and use this to clean them. This will allow you to also reach the corners of the tracks.
If this doesn’t work as well as it should, because there’s an excessive amount of dirt, try using some other common household materials, including:
- A butter knife
- An old toothbrush
- A rag
- A paper towel
Apply baking soda generously along the track, especially in the dirtier areas. Pour some vinegar on it and leave the mixture for five to ten minutes. You should be able to remove the dirt easily with any one of the household implements above.
- Remove Any Mold from the Window Sills
Mold can build up on your window sills due to condensation. This can also happen if your windows are leaking. It’s especially common on your bathroom and bedroom windows, as more dust tends to build up in these rooms.
You should dust your window sills regularly. You can also wipe them down or vacuum them. It’s something that can be easily forgotten, but mold is harmful to you and your family. Ensure you at least give them a thorough clean when you’re doing your window cleaning.
A great homemade cleaning solution for this particular problem is a mixture of white vinegar and tea tree oil. Use a spray bottle to apply it to your sills and leave it for roughly 30 minutes. You should be able to easily wipe the mold away.
- Exterior Window Cleaning Starts With Your Screens
Most window screens are removable. Cleaning the exterior of your windows is a good opportunity to remove your screens and clean them. Like your window tracks, screens can also be a magnet for dirt.
If you live in the central, eastern, or southwestern United States, you may also get a build-up of fibers from the cottonwood trees in your area. A quick and easy solution for removal is a lint brush or roller. This can also work on other materials that get caught in your screens, including spider webs!
If your screens require a little more work, try a spray that can dissolve dust but doesn’t require rinsing. The vinegar and dish soap solution above can do the trick.
- Clean Your Exterior Windows Like A Pro
One of the easier methods some homeowners swear by to clean their exterior windows involves a mild laundry detergent. Add it to warm water and use a soft brush to apply it to your windows. It usually doesn’t require manual drying. However, it leaves a streak-free, clean result.
Unfortunately, it doesn’t always work as well as it should. You can use the stronger, all-purpose solution detailed above instead. Using a mop or long-handled brush to apply the solution makes cleaning easier.
You can also use a squeegee and a hose with a sprayer attached for easier cleaning.
- A Cleaning Tool That Gives Great Results
One tool you can never go wrong with when it comes to window cleaning is the squeegee. All of the best window cleaners use it. However, its effectiveness is even more evident when you incorporate the methods the pros use as well.
It’s all about where you start and ensuring you wipe the squeegee blade as you clean. Start at the upper corner of the glass and pull the squeegee across the window. Ensure that it stays against the edge of the window.
Once you move it across the width of the glass, wipe the blade. This removes excess water and dirt and ensures there are no streaks. Continue this sequence until you’ve cleaned the entire glass.
- Remove Hard Water Stains
Sometimes your windows may have stubborn stains that require additional elbow grease. These include hard water stains. If your windows haven’t escaped these, try mixing the following:
- Lemon juice
- Vinegar
- Dish soap
Put vinegar in a spray bottle up to the halfway mark. Fill the other half with one part lemon juice and the other with dish soap. You may still have to do some scrubbing, but it will be a lot easier once you apply this solution.
- An Additional Drying Tool
Although the squeegee does most of the work, a microfiber cloth can add the finishing touch. The microfiber material ensures that any additional drying required doesn’t leave lint or streaks.
It can soak up excess water left by the squeegee, especially at the bottom and edges of the window. They’re also a great substitute if you don’t have a squeegee to remove water after cleaning.
- It’s All Possible Even with Taller Windows
You may be thinking these solutions are great. But also wondering how you can use them for your taller windows. You can use the same methods above but with different tools.
Use a hose with a sprayer attachment to apply the solutions to the exterior of your tall windows. Then dry them with a squeegee with a long handle. If you don’t have one, you can even try using a mop.
The Benefits of Clean Windows
Dirty windows don’t have to be a chore you avoid for as long as possible. It’s also no longer a hazardous undertaking, requiring ladders or scaffolding for taller windows. They are many DIY solutions that make window cleaning easier.
This is a great development because clean windows provide many benefits to homeowners. Here are a few:
It Saves You Money
Dirty windows reduce the amount of light entering your home. This can increase your heating bill. A simple cleaning can therefore save you money. Although most professionals recommended a thorough cleaning at least twice a year, you can choose to clean your windows more often. This will ensure a reasonable energy bill.
It Protects Your Investment
Depending on the type of window and the quantity you need, window installation or replacement can cost you anywhere from $200 to $1,800 per window. This is a substantial investment. However, it pays for itself, as windows can last for 20 to 25 years.
However, dirty windows can severely affect this lifespan, resulting in a much lower return on your investment—if any at all. Dirt, debris, dust, and grime can destroy your windows. These can scratch your windows, which can lead to distortion.
It Helps You Maintain Your Home’s Value
Distorted windows can adversely affect the value of your home. If you’re planning to put your home on the market, it becomes one more thing a potential owner will have to upgrade. Knowing this, they may offer you less than your selling price.
Well-maintained windows not only last longer, but a thorough cleaning can enhance your home’s curb appeal. It creates a great first impression for potential buyers and makes them want to see what’s inside.
Streak-Free Windows Without A Fuss
Cleaning windows may not be at the top of your list of fun things to do, but it’s necessary. Regular window cleaning not only makes your windows last longer, but it also protects your family from harmful mold and can reduce your energy bill.
The key to ensuring that cleaning your windows is hassle-free, while giving you a streak-free finish is using helpful tips for cleaning windows. The great thing about these is that they’re all cost-effective, easy solutions.
For other easy maintenance tips, check out our Home Improvements section.