HammBurg Be informed with latest news, reviews, entertainment, lifestyle tips, and much more.

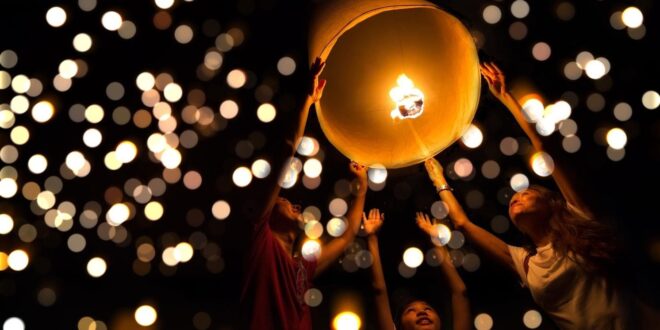
Adobe Premiere and Filmora are pro video editor software for desktop or PC. Various video edits can be done using these two popular video editor software. One of them is turning ordinary videos into bokeh
How to give a bokeh effect to a video using Adobe Premiere or Filmora is of course different. The following is a bokeh effect tutorial on video using these two professional video editor software.
How to Make a Video Bokeh Museum with Adobe Premiere
There are two ways to provide a bokeh effect in Adobe Premiere, first using presets, second using a special video bokeh effect.
1. Using the Bokeh Preset
Using presets is the easiest way to give a bokeh effect to a video through Premiere because you just have to choose a preset just like choosing an Instagram filter. Here are the steps:
- Download Bokeh Preset
The first step you have to do is download the bokeh preset for Adobe Premiere. Some presets may only be designed for certain Adobe Premiere series.
So, make sure that the bokeh preset you download matches the Adobe Premiere series you are using. Safest, use presets for the Adobe Premiere series that are lower than yours.
- Extract Files
If the preset is in RAR or ZIP form, don’t forget to extract it because Adobe can’t read ZIP or RAR files.
- Open Videos
If it has been downloaded. Open Adobe Premiere, then place the video that will be given a bokeh effect on the timeline or the Adobe Premiere clipboard.
- Load Preset
Load or import presets into Adobe Premiere. The trick is to click the Effect menu found in the Effects Panel on the lower left of the application. Then select import preset.
Open the folder where you saved the downloaded preset. Then double-click the extracted bokeh preset. The bokeh preset will appear in the Effect Panel
- Create Adjustment Layer
To apply the preset, you must first create an adjustment layer. The trick is to right click on the layer area or panel and select new item then select adjustment layer.
Adjust the height, width, timebase, and pixel ratio with the video to be edited. Then click ok.
- Drop the Adjustment Layer to the Timeline
Drop the adjustment layer to the timeline just like putting a video on the timeline. Set the length according to what you want. If you want the entire video to have a bokeh effect, then drag the adjustment layer until it is the same length as the video
- Apply Presets to the Adjustment Layer
The final step is to apply the preset to an adjustment layer. It’s very easy, click and hold the bokeh preset, then drag and drop it onto the adjustment layer
- Set the Preset Opacity
To adjust whether the bokeh effect is dark or dark, what you have to adjust is the adjustment layer. Set the opacity as you would a regular video opacity.
2. Using Bokeh Light Video
Most Adobe Premiere bokeh presets are paid presets. You can outsmart it by using a bokeh light video on the video which will be given a bokeh effect. The trick is:
- Download Bokeh Light Videos
Download bokeh light videos. Make sure the resolution and size are the same as the video to be edited
- Place Over Main Video
Open Adobe Premiere. Import bokeh light videos and videos to edit. Put both of them on the timeline. Make sure the bokeh light video is on top of the edited video
- Adjust the Video Bokeh Light Opacity
The final step is to adjust the opacity of the bokeh light video until the edited video looks clearer.
Providing a bokeh effect using a bokeh light video is not as good as presetting because later the entire video color will change to adjust the bokeh light video. In addition, objects that will not have a bokeh effect will also have a bokeh effect.
The two methods above only provide a bokeh light effect, not blur the video background. To makehe video background blurry so that the bokeh effect is clearer and more interesting, here are the steps.
Create a Blur Video Background in Adobe Premiere
- Choose Videos
Open Adobe Premiere. Import video. Then drag the video whose background will be blurred to the timeline
- Search for the blur effect
Go to the effects panel, in the search box type the name of the effect “Gaussian Blur”. Writing can be all capital letters or all lowercase letters, the capitalization of the letters does not affect the search results for effects.
- Apply Effects
Click, hold, and drag the Gaussian Blur effect then drop or paste it to the video on the timeline
- Enter the Effect Control Menu
Look for the Gaussian Blur effect. Below the effect there is a pen tip symbol (like a pen for writing calligraphy), the symbol is called Free Draw Bezier. Click the icon.
- Selection of Unblurred Objects
Use Free Draw Bezier earlier to select objects that will not be blurred. It should be noted that if the object that is not going to be blurred is a moving object, the result of the selection will not move, so it may not be suitable.
So after finishing selecting one object in the next second, you must select the same object in the next second until the selection results are really only on that object
- Set Mask Expansion
Return to the Effect Control menu, under the Gaussian Blur effect, look for Mask, then look for the Mask Expansion option, type the number you like, for example 30.The object that was selected becomes blurry while the background is not blurry
- Click Inverted
So that the object does not blur and the background becomes blurry, check the box next to the words “Inverted”. The result will immediately change, the object will be visible while the background becomes blurry.
If the result is too blurry or less blurry then you can change the number in the Mask Expansion column earlier. The bigger the number, the background / object will be blurred and vice versa.
Suggested Reads: List of Android Bokeh Video Applications for Beginners
You can also apply this blur step to bokeh lights. If you want the light to look blurry then you can select the lights, then adjust the blur level. Because what is blurred is the bokeh light, there is no need to check the “Inverted” box.
How to Apply a Bokeh and Blur Effect with Filmora
Providing bokeh and blur effects to Filmora can be done at once. Just use the effect. No need to work twice. Here are the steps to make the video bokeh and blur:
- Open the Filmora desktop application
- Choose the media menu, then import videos
- Click, hold, and drag the video to be edited onto the Filmora timeline
- Then click the Effects menu
- Type an effect called Bokeh Blur. The Bokeh Blur 1-Bokeh Blur 6 will appear. Choose the one you like best.
- Drag the effect on the video to be edited on the timeline
- The effect is only seconds long. So that as long as the video gets a bokeh effect, copy the effect and paste it into another part of the video that has not yet had the effect. Repeat this step until the entire video ends
- Try playing a video. It can be seen that the video not only has a bokeh light effect but also has a blur effect.
- To make the video cooler, you can add other effects that affect the color of the video, for example, such as Purple Love
The bokeh video effect above will provide a blur effect on the bokeh so that all objects in the video remain in focus. If you want to blur the main object’s background, just add a Square Blur or Slant Blur effect.