HammBurg Be informed with latest news, reviews, entertainment, lifestyle tips, and much more.

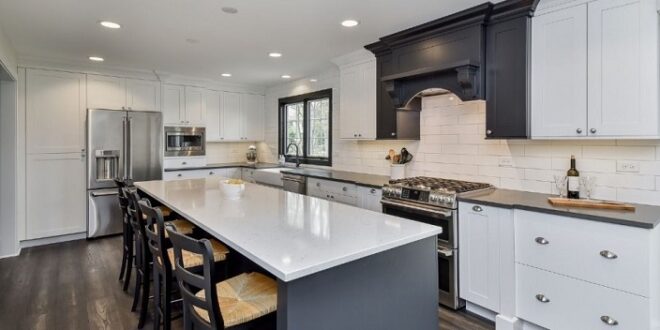
Despite changes in the way people live and an increased tendency for open-plan living and smart homes, the kitchen remains the heart of most homes. That means people tend to pay a lot of attention to how a kitchen is designed. One of the key features of any kitchen is the lighting.
You need it to be bright and inviting, that’s why many people opt for recessed or low-profile LED lights. It will transform the space and it is surprisingly easy to achieve.
However, it should be noted that this project involves electricity and the safest approach is to get a level 2 electrician to do the work for you. At the very least you should get them to inspect your work and sign it off as safe.
What You’ll Need To Install Low-Profile LED Lights
- Drill
- Circular cutter attachment for drill
- Wire cutters
- Wire strippers
That’s it!
Create Your Design
The first step is to decide where you want your low-profile LED lights to go. The best approach is to plan them roughly 2-3ft apart. This will help to ensure you have even light distribution across the kitchen. Of course, you can go for more or less according to your preference.
Mark It Up
The next step is to mark all the pieces of your kitchen ceiling. Although low-profile LED lights are small enough to go under joists this does make them harder to install. Instead, mark all the joists with masking tape and then use a coloured tape to create crosses where the lights are to be fitted. You can then take a moment to ensure you are happy with the layout.
Cutting Holes
Now you know where your lights are going you can take a circular cutter that is the same size as the recessed element of the LED light. Attach this to your drill and drill the holes in your ceiling. You do need to wear safety goggles to prevent the dust from drilling going into your eyes
Once you have the holes you’ll need to drill through the joist. Do this at an angle from the first hole and approximately in the centre of the joist.
Then, using a flexible drill bit, go through the hole and make a second. If you’ve lined them up properly you’ll come out of the joist by the next light hole. Leave the drill bit in situ and remove the drill. This will allow you to attach cables to the drill bit and pull them between the holes.
You can repeat this to ensure you have cables in every hole.
Connecting Up
Your recessed lights will have connectors that you can secure your new wires into. Once you’ve connected the connector you can slide the light into the ceiling hole and its springs will hold it in place. You can repeat this for every light until you get to the final one. The outgoing cable for this one needs to go to the original central hole. You may even be there if you are putting a recessed light where the original light was.
Make sure the power is off as you disconnect the original centre lamp and connect the wires to the first of your LED lights. Don’t forget to use the provided transformer.
You can now turn the power back on and admire your handiwork.