HammBurg Be informed with latest news, reviews, entertainment, lifestyle tips, and much more.

Now a day’s teams are working remotely, and with online learning, screen recording is getting common. From recording lectures to giving presentations and online meeting screen recorder is helping.
Whether you want to create video lessons for students or capture gameplays, you need a recorder to record your screen and Webcam.
Every software comes with its pros and cons, whether it’s free or paid. But, if you’re looking for the best free screen recorder, then you came to the right place.
You may find it hard to choose the right software. But, the iFun screen recorder breaks all the barriers and provides the best features.
Read on to know how to use the iFun Screen recorder to record the screen with your Webcam.
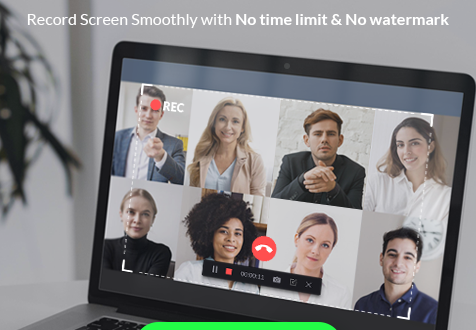
iFun Screen Recorder
iFun screen recorder is the best and free choice to record your screen and Webcam simultaneously. You can use this software to add a FaceCam overlay to the screen recording with few clicks.
The software enables you to change the brightness and bitrate of your Webcam. Moreover, you can record audio with a microphone while recording your screen.
The free recorder also enables you to do real-time editing of your recorded videos. It allows you to share your edited videos on social media platforms like YouTube.
Ways to use iFun Screen Recorder to Record Screen with WebCam on
Below are some straightforward ways on how to record screen and Webcam at the same time on Windows 10:
Step 1.
Go to your browser and download the iFun screen recorder on your computer for free. Launch iFun Screen Recorder. From the main screen, select the “Record” option and other options like audio, etc.
Step 2.
From the Full-Screen option drop-down, you can select customize screen. You can choose “Full Screen,” “A Region,” “Fixed Region,” or your customize window size.
To record your Webcam along with a screen, make sure you connect a webcam to your computer.
Step 3.
Click on the “Mic” option, and you can also choose to record your system sound only or both audio and microphone.
Step 4.
Click on the “Rec” option to start your recording. From the “Recording Settings,” you can select different video recording options.
From the option, you may select your desired folder to save your recorded video. Moreover, you can choose your video recording options. The video recording options include the following.
- Video Size
- Format
- Frame Rate
- Quality
You can choose the different frame rates and formats to record high-quality videos. Moreover, you can select audio recording options, which include:
- Format
- Frame Rate
The software also has a no watermark feature. You have to click on add watermark option from the setting to add it or deselect the watermark option.
Step 5.
After connecting your Webcam to your computer, make sure to click on the “WebCam” option. By clicking on the webcam option, you can record videos with audio and Webcam on at the same time.
Step 6.
After recording your videos, you can access them in the “My Creation” folder. Moreover, you can edit your videos to cut and trim them. “Right Click” on your videos from my creation and edit how you like.
The iFun free screen recorder allows you to share your recorded and edited videos over social media platforms.
The software also enables you to capture your screen between your video recordings. You can take a screenshot while recording videos in any format.
Conclusion
Tons of software provide video recording with Webcam on, but iFun ace all of them.
iFun is 100% Free Screen Recording Tool, and it’s user-friendly. The interface of the software will enable you to record your gameplays and lectures with Webcam.